Amazon Web Services (AWS) Cloud9
Table of contents
- Notice
- What is AWS Cloud9?
- How to create an IAM role for an AWS cloud9 workspace
- How to create an AWS cloud9
- How to set configurations of the AWS cloud9
- How to install utilities for developing the Amazon EKS on the AWS cloud9
- How to create and import a SSH key
- How to create an AWS KMS custom managed key (CMK)
- How to resize the Elastic Block Storage (EBS) volume
- How to fix error
- Reference
1. Notice
- A guide for setting the Amazon Web Services (AWS) Cloud9
- The name of region is Asia Pacific (Seoul) and the corresponding code is ap-northeast-2 [1].
- I recommend that you should ignore the commented instructions with an octothorpe, #.
- I recommend that you should fill in the appropriate letters between the parentheses, <>.
2. What is AWS Cloud9?
AWS Cloud9 is a cloud-based integrated development environment (IDE) that lets you write, run, and debug your code with just a browser. It includes a code editor, debugger, and terminal. Cloud9 comes prepackaged with essential tools for popular programming languages, including JavaScript, Python, PHP, and more, so you don’t need to install files or configure your development machine to start new projects [2].
3. How to create an IAM role for an AWS cloud9 workspace
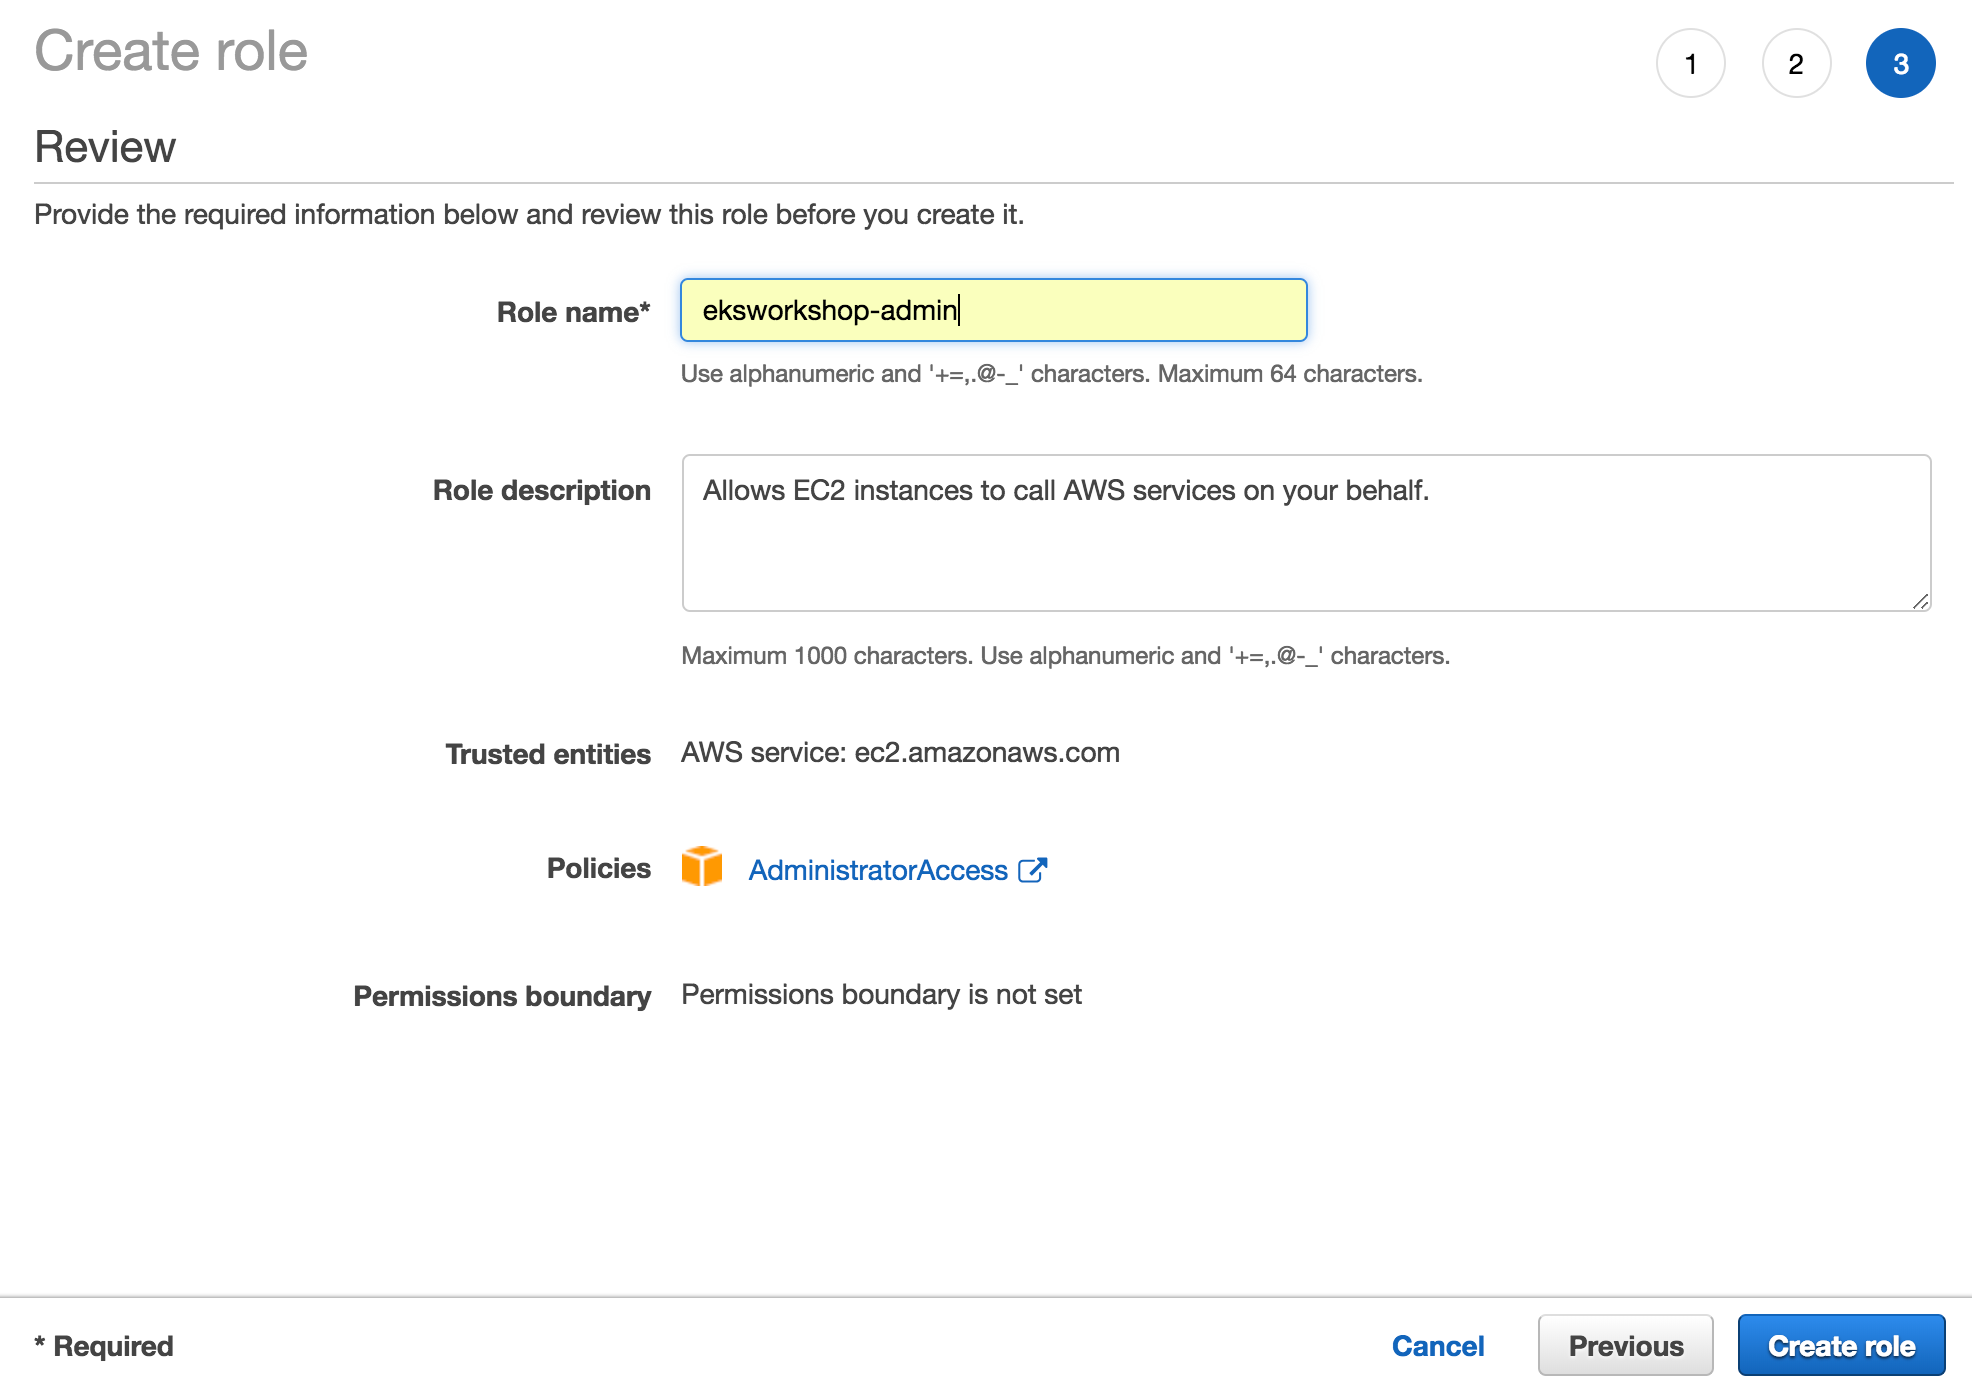
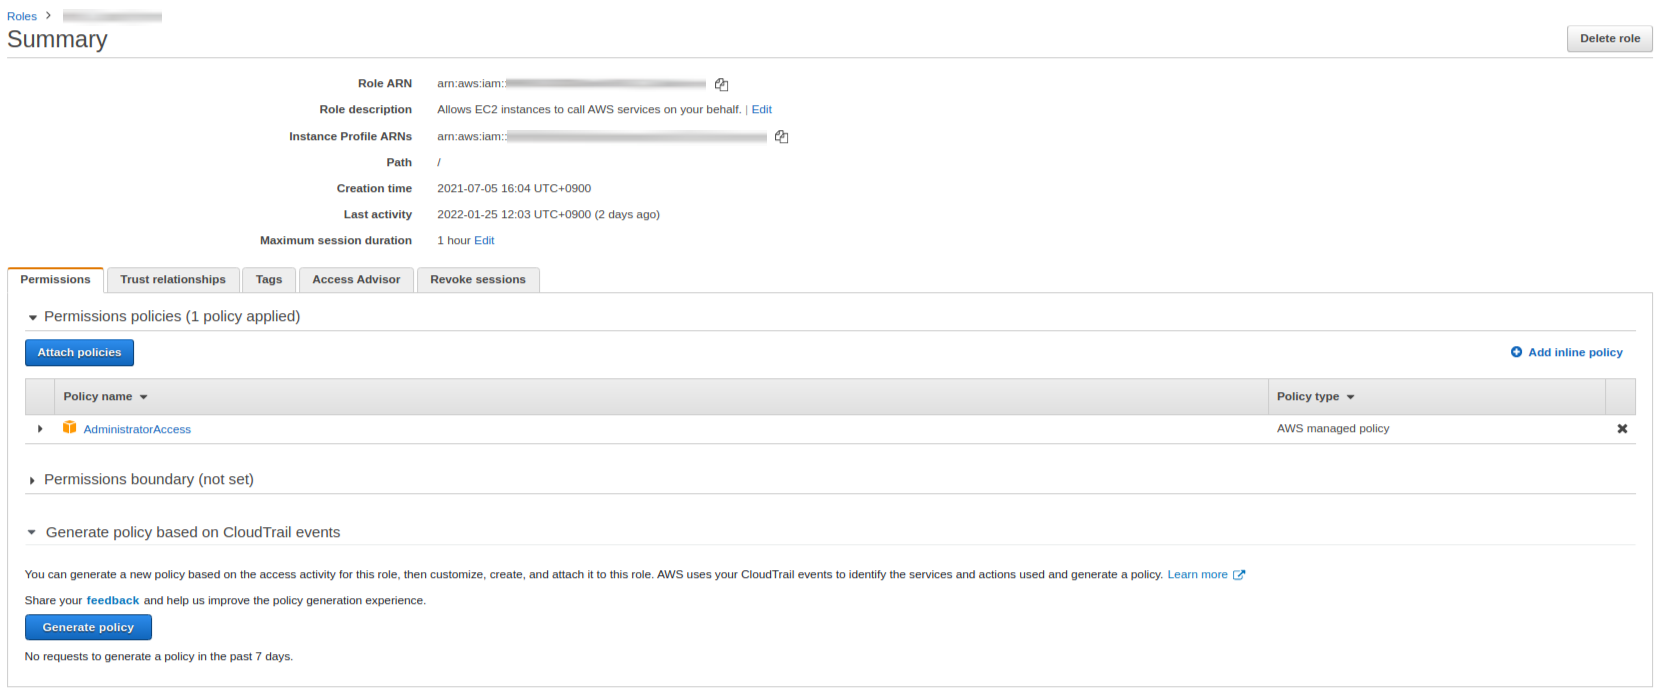
You can create an Identity and Access Management (IAM) role on AWS IAM management console - Role. Fig. 1 shows how to create an IAM role and result of the created IAM role. You can refer to the AWS EKS workshop guide to create an IAM role, Create an IAM role fol your workspace.
4. How to create an AWS cloud9
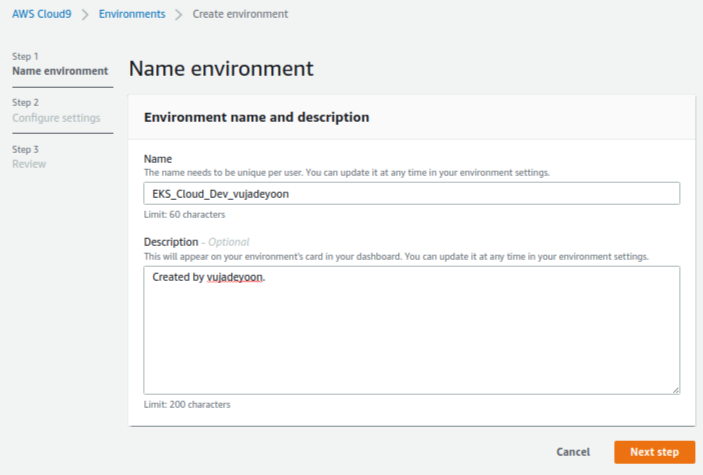
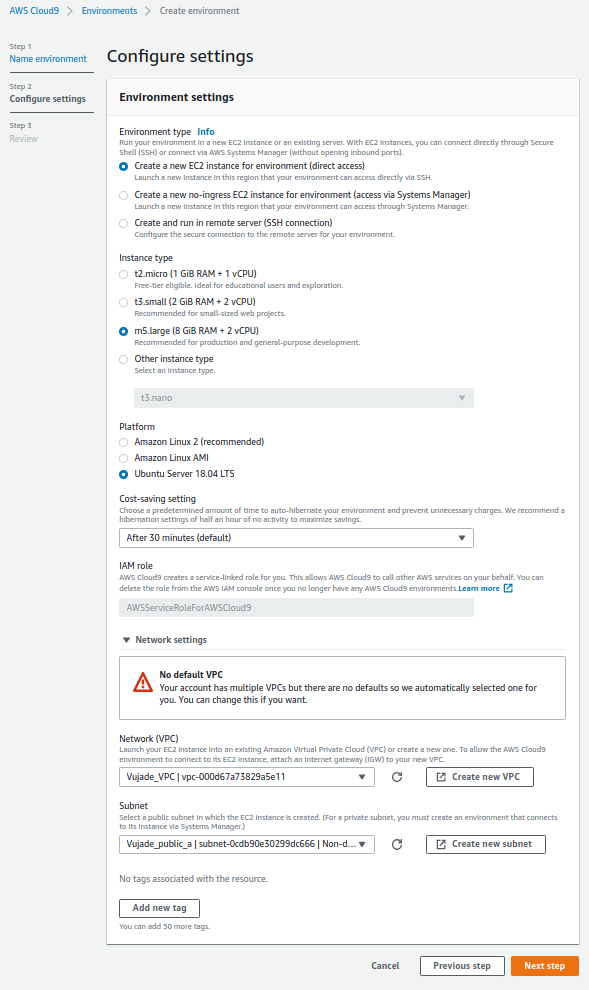
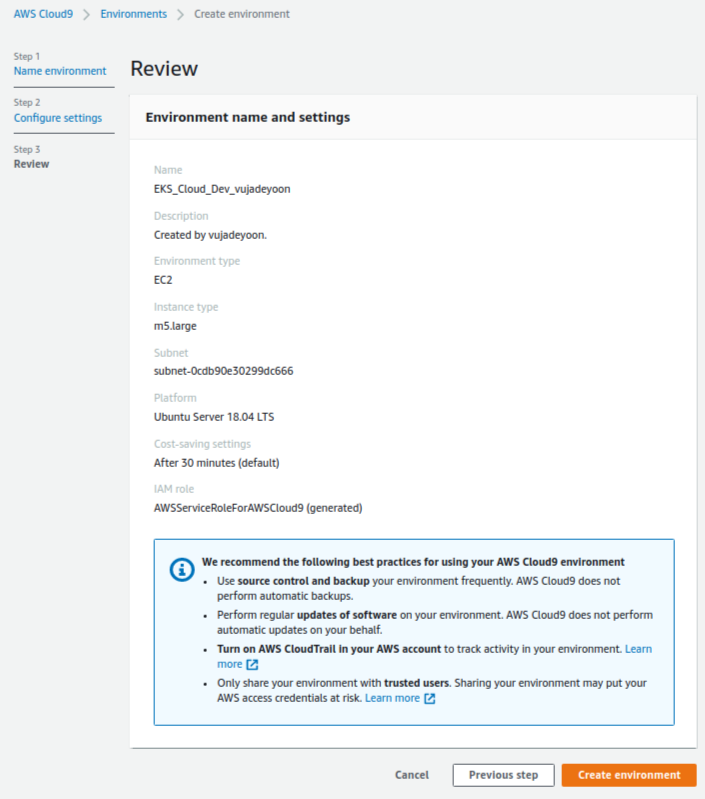
You can create an AWS cloud9 as shown in Fig. 2. There are two important things as follows: i) I recommend that you should select a m5.large (8 GiB RAM + 2vCPU) instance among instance types; ii) You should select a public subnet. The options for creating the AWS cloud9 as follows:
| No. | Environment type | Instance type | Platform | Cost-saving setting | Network (VPC) | Subnet | |
|---|---|---|---|---|---|---|---|
| 1 | Create a new EC2 instance for environment (direct access) | m5.large (8 GiB RAM + 2vCPU) | Ubuntu Server 18.04 LTS | After 30 minutes (default) | Vujade_VPC | Vujade_public_a |
5. How to set configurations of the AWS cloud9
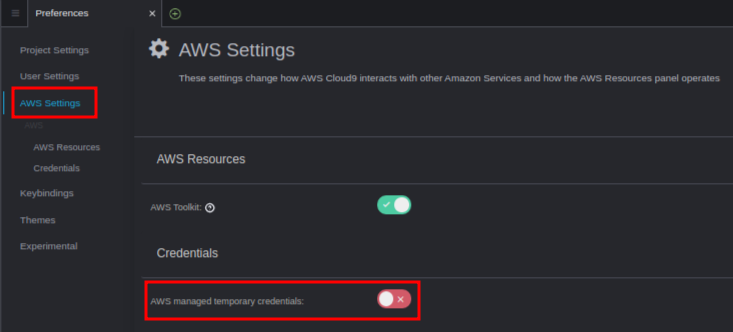
You should set two configurations of the AWS cloud: i) Attaching the IAM role; ii) Disabling AWS managed temporary credentials.
- Attaching the IAM role
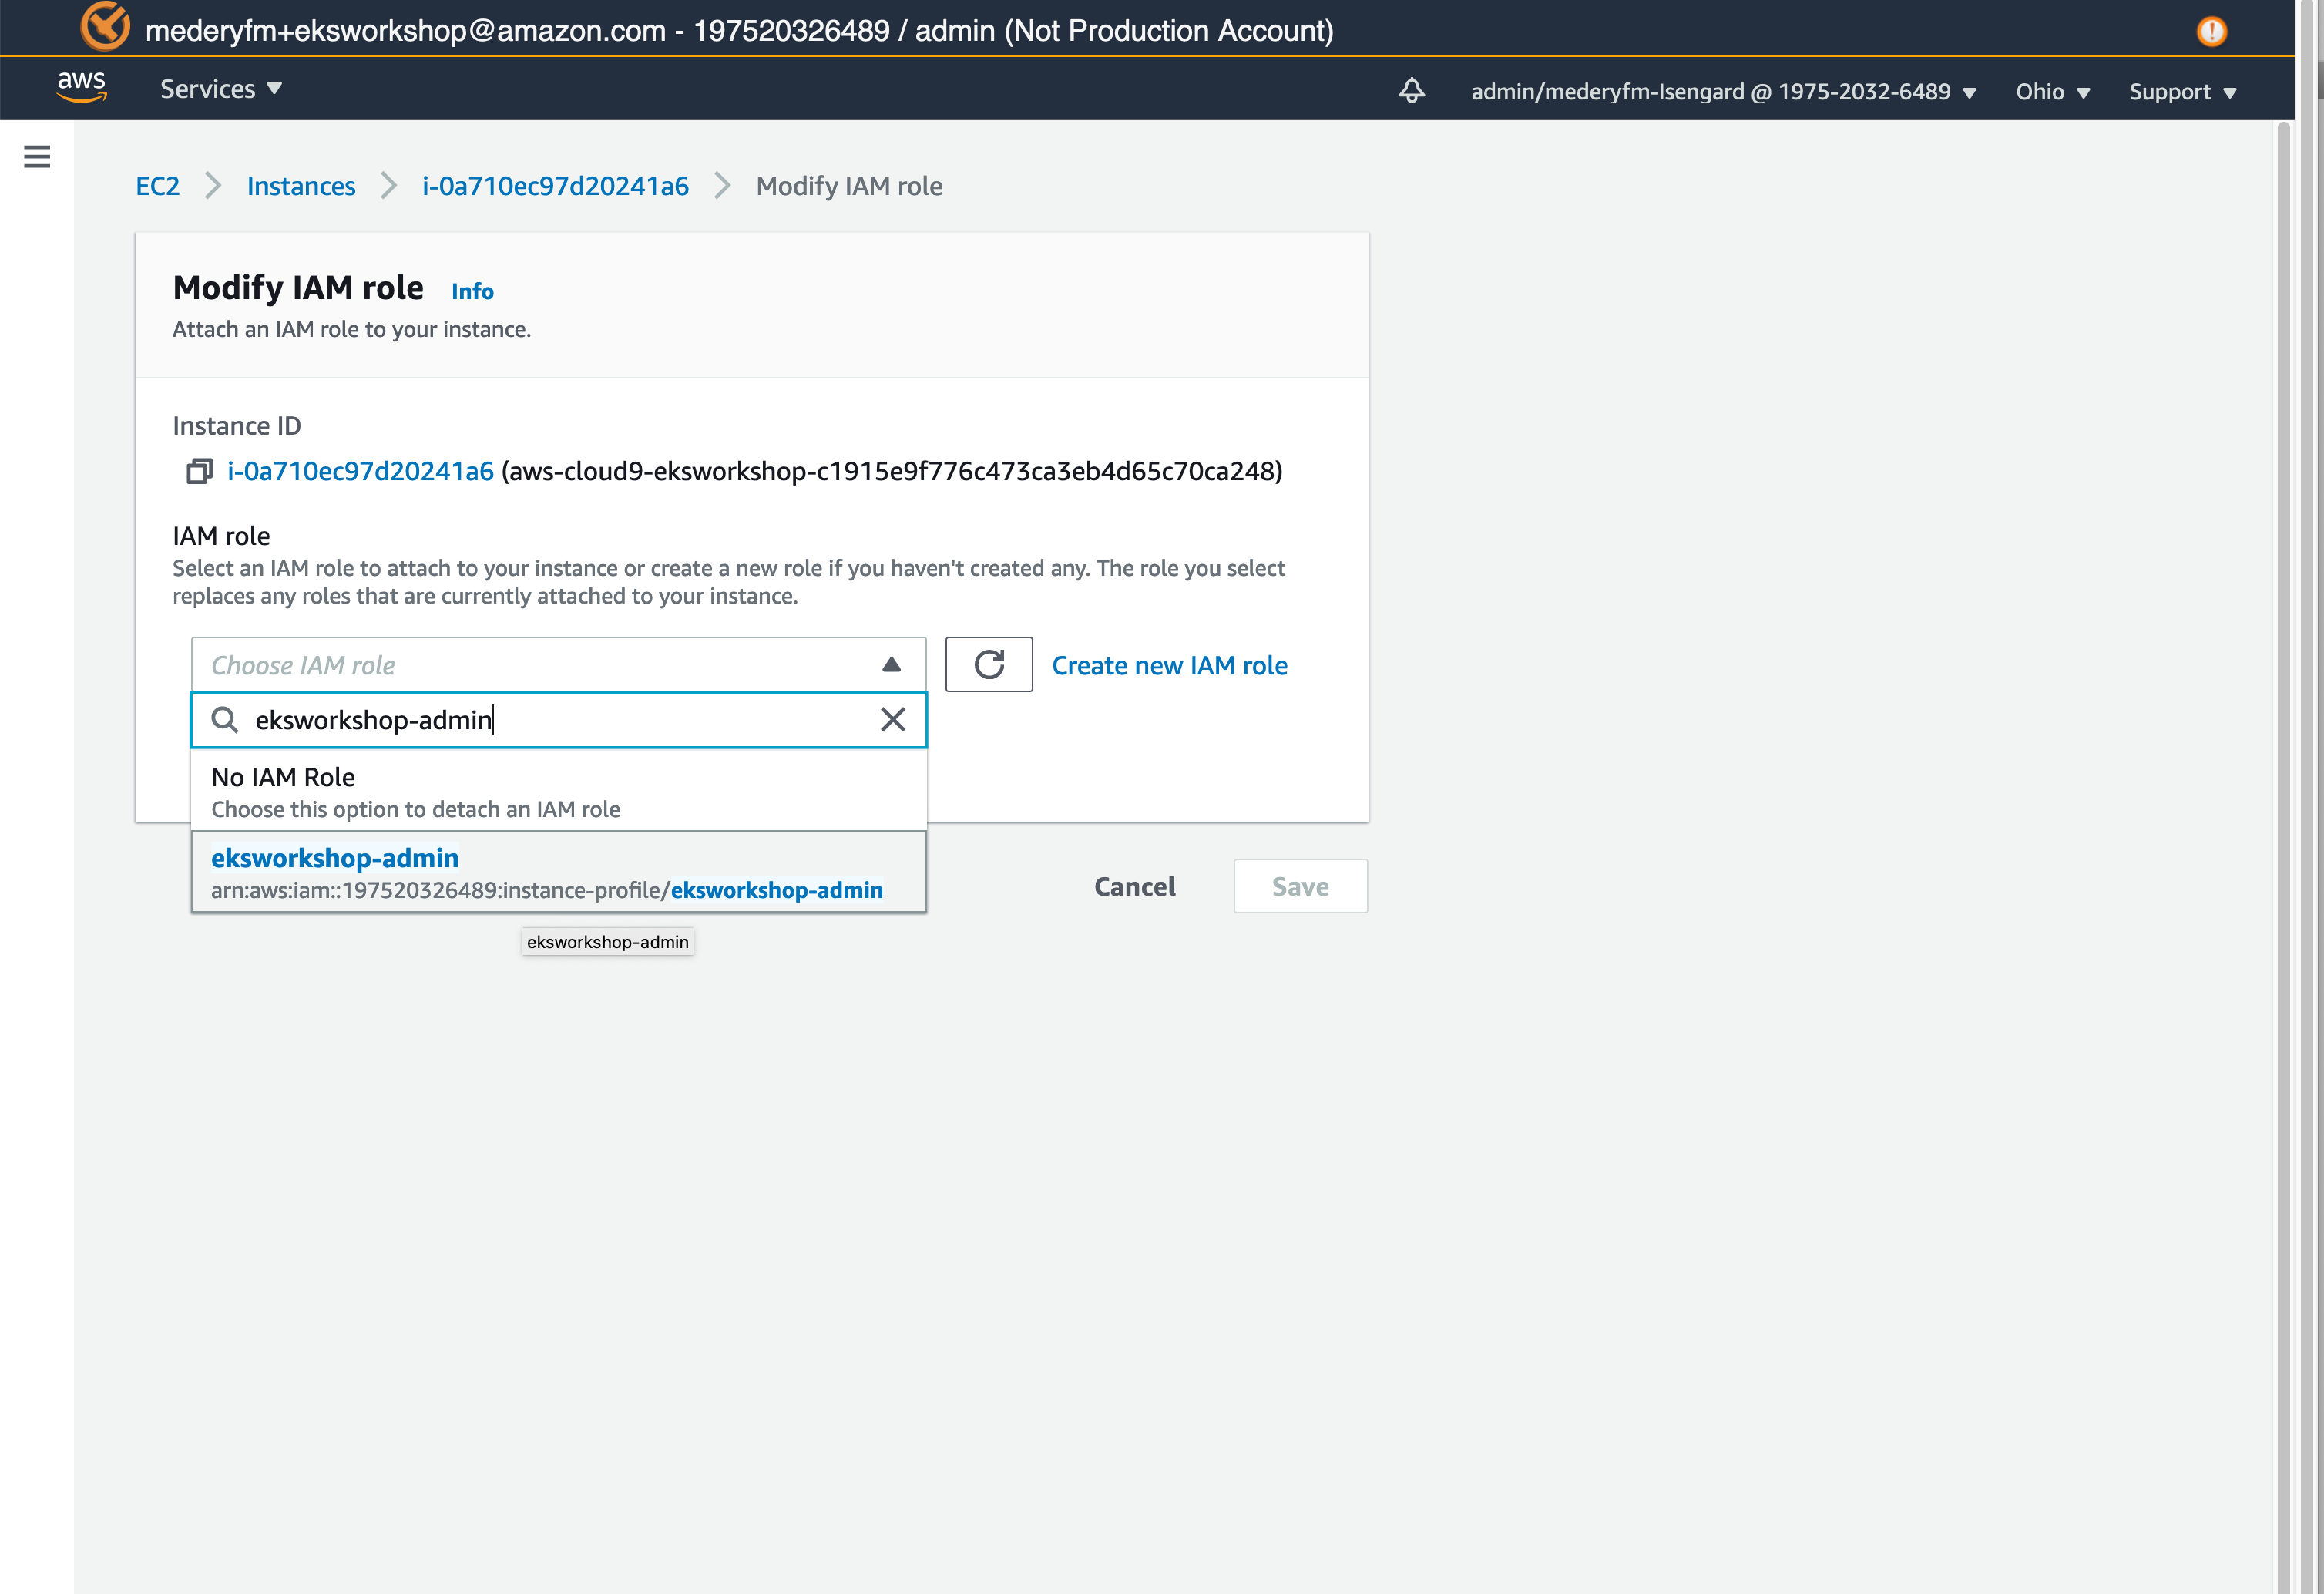
You can attach the IAM role which is created in the Section 3. How to create an IAM role for an AWS cloud9 workspace as shown in Fig. 3. You can refer to the AWS EKS workshop guide, Attach the IAM role to your workspace. - Disabling AWS managed temporary credentials
You can disable the AWS managed temporary credentials as shown in Fig. 4.
6. How to install utilities for developing the Amazon EKS on the AWS cloud9
You can easily install utilities for developing the Amazon EKS on the AWS cloud9 by executing bash_install_utils_eks.sh. Please note that you should type a correct the name of the IAM role which is created in the Section 3. How to create an IAM role for an AWS cloud9 workspace. You can refer to the official guides [3]–[7].
1 $ bash bash_install_utils_eks.sh <NAME_IAM_ROLE>
bash_install_utils_eks.sh
1
2
3
4
5
6
7
8
9
10
11
12
13
14
15
16
17
18
19
20
21
22
23
24
25
26
27
28
29
30
31
32
33
34
35
36
37
38
39
40
41
42
43
44
45
46
47
48
49
50
51
52
53
54
55
56
57
58
59
60
61
62
63
64
65
66
67
68
69
70
71
72
73
74
75
76
77
78
79
80
81
82
83
84
85
86
87
88
89
90
91
92
93
94
95
96
97
98
99
100
101
102

 # Dveloper: vujadeyoon
 # Email: vujadeyoon@gmail.com
 # Github: https://github.com/vujadeyoon
 # Personal website: https://vujadeyoon.github.io
 #
 # Title: bash_install_utils_eks.sh
 # Description: A bash script to install utilities for EKS.
 #
 #
 # Set name of the created IAM role for the AWS cloud9.
 NAME_IAM_ROLE=$1
 #
 #
 # Installing utilities
 echo '============================================'
 echo 'Utilities'
 echo '============================================'
 sudo apt-get install -y yum
 sudo snap install yq
 sudo apt-get install -y gettext bash-completion moreutils jq
 sudo pip install --upgrade awscli && hash -r
 #
 #
 # Environmnet configuration
 echo '============================================'
 echo 'Environment configuration'
 echo '============================================'
 export ACCOUNT_ID=$(aws sts get-caller-identity --output text --query Account)
 export AWS_REGION=$(curl -s 169.254.169.254/latest/dynamic/instance-identity/document | jq -r '.region')
 test -n "$AWS_REGION" && echo AWS_REGION is "$AWS_REGION" || echo AWS_REGION is not set
 echo "export ACCOUNT_ID=${ACCOUNT_ID}" | tee -a ~/.bash_profile
 echo "export AWS_REGION=${AWS_REGION}" | tee -a ~/.bash_profile
 aws configure set default.region ${AWS_REGION}
 aws configure get default.region
 aws sts get-caller-identity --query Arn | grep ${NAME_IAM_ROLE} -q && echo "IAM role valid" || echo "IAM role NOT valid"
 #
 #
 # Installing Elastic Load Balancing (ELB)
 echo '============================================'
 echo 'Elastic Load Balancing (ELB)'
 echo '============================================'
 aws iam get-role --role-name "AWSServiceRoleForElasticLoadBalancing" || aws iam create-service-linked-role --aws-service-name "elasticloadbalancing.amazonaws.com"
 #
 #
 # Installing eksctl
 echo '============================================'
 echo 'EKSCTL'
 echo '============================================'
 curl --silent --location "https://github.com/weaveworks/eksctl/releases/latest/download/eksctl_$(uname -s)_amd64.tar.gz" | tar xz -C /tmp
 sudo mv -v /tmp/eksctl /usr/local/bin
 eksctl completion bash >> ~/.bash_completion
 . /etc/profile.d/bash_completion.sh
 . ~/.bash_completion
 #
 #
 # Installing kubectl
 echo '============================================'
 echo 'KUBECTL'
 echo '============================================'
 sudo curl --silent --location -o /usr/local/bin/kubectl https://amazon-eks.s3.us-west-2.amazonaws.com/1.17.11/2020-09-18/bin/linux/amd64/kubectl
 #
 sudo chmod +x /usr/local/bin/kubectl
 #
 #
 # Installing yq for yaml processing
 echo 'yq() {
   docker run --rm -i -v "${PWD}":/workdir mikefarah/yq yq "$@"
 }' | tee -a ~/.bashrc && source ~/.bashrc
 #
 #
 # Verifying the binaries are in the path and executable
 for command in kubectl jq envsubst aws
   do
     which $command &>/dev/null && echo "$command in path" || echo "$command NOT FOUND"
   done
 #
 #
 # Enable kubectl bash_completion
 kubectl completion bash >>  ~/.bash_completion
 . /etc/profile.d/bash_completion.sh
 . ~/.bash_completion
 #
 #
 # Set the AWS Load Balancer Controller version
 echo 'export LBC_VERSION="v2.0.0"' >>  ~/.bash_profile
 .  ~/.bash_profile
 #
 echo '============================================'
 echo 'Helem'
 echo '============================================'
 curl -sSL https://raw.githubusercontent.com/helm/helm/master/scripts/get-helm-3 | bash
 helm version --short
 helm repo add stable https://charts.helm.sh/stable
 helm search repo stable
 helm completion bash >> ~/.bash_completion
 . /etc/profile.d/bash_completion.sh
 . ~/.bash_completion
 source <(helm completion bash)
 #
 echo 'eksctl version is' $(eksctl version)
 echo 'kubectl version is' $(kubectl version --client --short)
7. How to create and import a SSH key
Before proceeding with how to create and import a Secure Shell Protocol (SSH) key which can be used to create a cluster and access a worker node in the Amazon EKS, I would like to point out that only a main developer for the Amazon EKS should create and import the SSH key once. The other developer can use the SSH key that is shared from the main developer. You should follow two steps to create and import the SSH key as follows.
- How to create the SSH key
You can easily create the SSH key as below.1 $ ssh-keygenGenerating public/private rsa key pair. Enter file in which to save the key (/home/ubuntu/.ssh/id_rsa): Enter passphrase (empty for no passphrase): Enter same passphrase again: Your identification has been saved in /home/ubuntu/.ssh/id_rsa. Your public key has been saved in /home/ubuntu/.ssh/id_rsa.pub. The key fingerprint is: SHA256:R0r6qAcJ34PHBdS1m2ZrF2bgo+nUANwDPcECt0TUTvo ubuntu@ip-10-172-96-182 The key's randomart image is: +---[RSA 3072]----+ | .=B=.o. | | +o+B . | | +*+.+ | | . .+o= + | | o =.oS O + | | = =oEO = . | | o..= + . | | ..o . . | | .. . | +----[SHA256]-----+ - How to import the created SSH key
You can import the created SSH key as below. Please note that you can replace the vujade-eks with the name that you want. In this case, The vujade-eks is used as SSH key name. You can get more information AWS CLI Command Reference - import-key-pair in details.1 $ aws ec2 import-key-pair --key-name vujade-eks --public-key-material file://~/.ssh/id_rsa.pub{ "KeyName": "vujade-eks", "KeyFingerprint": "1f:51:ae:28:bf:89:e9:d8:1f:25:5d:37:2d:7d:b8:ca", "KeyPairId": "key-1g15s88175abcd1aa" } - How to import the shared SSH key to a new AWS Cloud9 instance
Please note that you must keep an original key which is located in ~/.aws/authorized_keys. If you lose the information, you cannot access the AWS Cloud9. Thus, you follow below instructions carefully to keep the original authorized key.- Copy the shared ~/.ssh/id_rsa.
- Copy the shared ~/.ssh/id_rsa.pub.
- Add the key in the shared ~/.ssh/authorized_keys to the ~/.ssh/authorized_keys for the new AWS Cloud instance.
8. How to create an AWS KMS custom managed key (CMK)
Like creating and importing the SSH key in the Section 7. How to create and import a SSH key, only a main developer for the Amazon EKS should create a CMK once. The other developer can use the CMK that is shared from the main developer.
- How to create the CMK
You can crate the CMK as below. Please note that you can replace the vujade-eks with the name that you want. In this case, The vujade-eks is used as CMK key name. Please note that you can check your own account ID number from the result. In this case, the account ID is 123456789123.1 $ aws kms create-alias --alias-name alias/vujade-eks --target-key-id $(aws kms create-key --query KeyMetadata.Arn --output text) 2 $ export MASTER_ARN=$(aws kms describe-key --key-id alias/vujade-eks --query KeyMetadata.Arn --output text) 3 $ echo "export MASTER_ARN=${MASTER_ARN}" | tee -a ~/.bash_profileexport MASTER_ARN=arn:aws:kms:ap-northeast-2:123456789123:key/a0b1234c-de5f-6789-g01h-2i3456j789k0 - How to check the created CMK
You can check the created CMK by executing below command. You can get CMK key ID from the Section 8-1. How to create the CMK. In this case, the CMK key ID is a0b1234c-de5f-6789-g01h-2i3456j789k0.1 $ aws kms list-aliases --key-id a0b1234c-de5f-6789-g01h-2i3456j789k0{ "Aliases": [ { "AliasArn": "arn:aws:kms:ap-northeast-2:123456789123:alias/vujade-eks", "CreationDate": 1642430327.096, "AliasName": "alias/vujade-eks", "LastUpdatedDate": 1642430327.096, "TargetKeyId": "a0b1234c-de5f-6789-g01h-2i3456j789k0" } ] } - How to get the AWS account ID
You can also get the AWS account ID as follows.1 $ aws sts get-caller-identity --query Account --output text123456789123
9. How to resize the Elastic Block Storage (EBS) volume
You should resize the EBS of the Amazon Elastic Compute Cloud (Amazon EC2) on the EC2 dashboard as shown in Fig. 5.
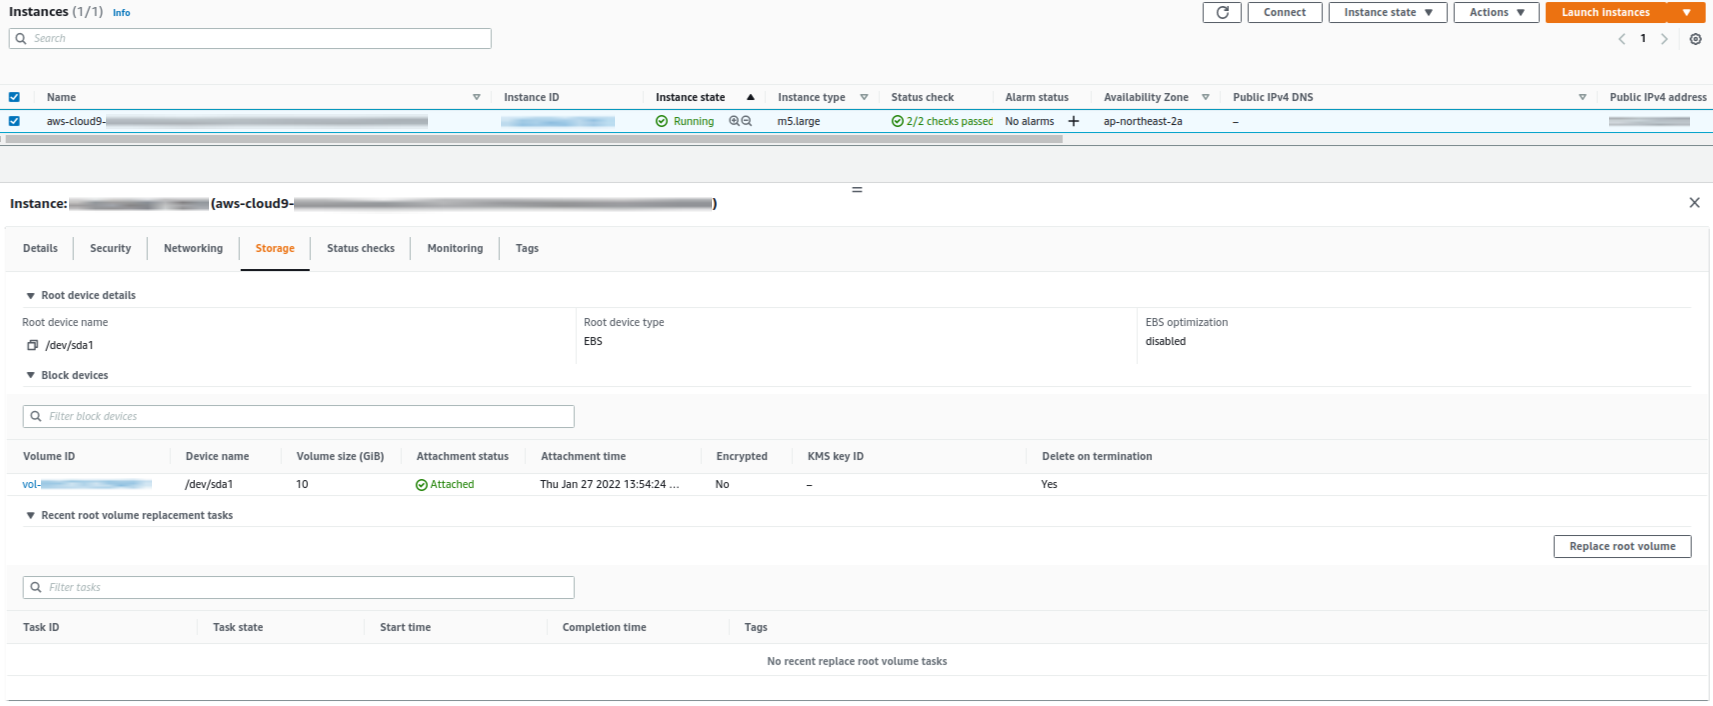
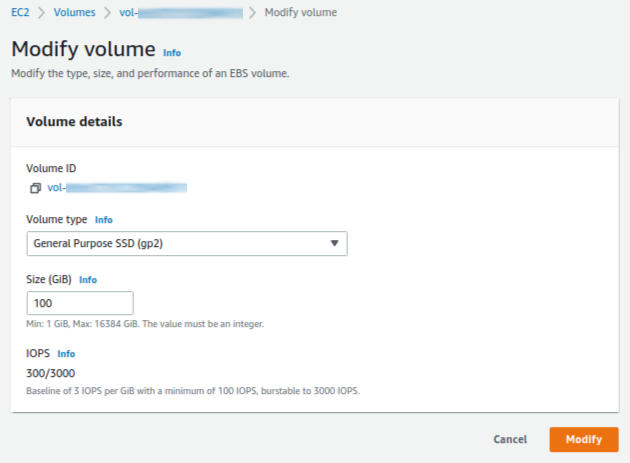
After you resize the EBS, you should follow below steps to apply the resized EBS. You can check the name of target disk of which size is resized volume. In this case, the name of target block device is nvme0n1.
1 $ lsblk
    NAME        MAJ:MIN RM   SIZE RO TYPE MOUNTPOINT
    loop0         7:0    0  43.3M  1 loop /snap/snapd/14295
    loop1         7:1    0    25M  1 loop /snap/amazon-ssm-agent/4046
    loop2         7:2    0  99.4M  1 loop /snap/core/11993
    loop3         7:3    0  55.5M  1 loop /snap/core18/2253
    loop4         7:4    0  55.5M  1 loop /snap/core18/2284
    loop5         7:5    0  43.4M  1 loop /snap/snapd/14549
    loop6         7:6    0 110.5M  1 loop /snap/core/12603
    loop7         7:7    0   4.7M  1 loop /snap/yq/1515
    nvme0n1     259:0    0   100G  0 disk
    └─nvme0n1p1 259:1    0    10G  0 part /
Then you can grow partition as below.
1 $ sudo growpart /dev/nvme0n1 1
CHANGED: partition=1 start=2048 old: size=20969439 end=20971487 new: size=209713119,end=209715167
You can resize the filesystem after checking the filesystem name. In this case, the filesystem name is /dev/nvme0n1p1.
1 $ df -h
    Filesystem      Size  Used Avail Use% Mounted on
    udev            3.8G     0  3.8G   0% /dev
    tmpfs           767M  800K  766M   1% /run
    /dev/nvme0n1p1  9.7G  9.0G  658M  94% /
    tmpfs           3.8G     0  3.8G   0% /dev/shm
    tmpfs           5.0M     0  5.0M   0% /run/lock
    tmpfs           3.8G     0  3.8G   0% /sys/fs/cgroup
    /dev/loop0       44M   44M     0 100% /snap/snapd/14295
    /dev/loop1       25M   25M     0 100% /snap/amazon-ssm-agent/4046
    /dev/loop2      100M  100M     0 100% /snap/core/11993
    /dev/loop3       56M   56M     0 100% /snap/core18/2253
    tmpfs           767M     0  767M   0% /run/user/1000
    /dev/loop4       56M   56M     0 100% /snap/core18/2284
    /dev/loop5       44M   44M     0 100% /snap/snapd/14549
    /dev/loop6      111M  111M     0 100% /snap/core/12603
    /dev/loop7      4.8M  4.8M     0 100% /snap/yq/1515
1 $ sudo resize2fs /dev/nvme0n1p1
    resize2fs 1.44.1 (24-Mar-2018)
    Filesystem at /dev/nvme0n1p1 is mounted on /; on-line resizing required
    old_desc_blocks = 2, new_desc_blocks = 13
    The filesystem on /dev/nvme0n1p1 is now 26214139 (4k) blocks long.
Finally, you can check the resized EBS as below.
1 $ lsblk
    NAME        MAJ:MIN RM   SIZE RO TYPE MOUNTPOINT
    loop0         7:0    0  43.3M  1 loop /snap/snapd/14295
    loop1         7:1    0    25M  1 loop /snap/amazon-ssm-agent/4046
    loop2         7:2    0  99.4M  1 loop /snap/core/11993
    loop3         7:3    0  55.5M  1 loop /snap/core18/2253
    loop4         7:4    0  55.5M  1 loop /snap/core18/2284
    loop5         7:5    0  43.4M  1 loop /snap/snapd/14549
    loop6         7:6    0 110.5M  1 loop /snap/core/12603
    loop7         7:7    0   4.7M  1 loop /snap/yq/1515
    nvme0n1     259:0    0   100G  0 disk
    └─nvme0n1p1 259:1    0   100G  0 part /
1 $ df -h
    Filesystem      Size  Used Avail Use% Mounted on
    udev            3.8G     0  3.8G   0% /dev
    tmpfs           767M  800K  766M   1% /run
    /dev/nvme0n1p1   97G  9.0G   88G  10% /
    tmpfs           3.8G     0  3.8G   0% /dev/shm
    tmpfs           5.0M     0  5.0M   0% /run/lock
    tmpfs           3.8G     0  3.8G   0% /sys/fs/cgroup
    /dev/loop0       44M   44M     0 100% /snap/snapd/14295
    /dev/loop1       25M   25M     0 100% /snap/amazon-ssm-agent/4046
    /dev/loop2      100M  100M     0 100% /snap/core/11993
    /dev/loop3       56M   56M     0 100% /snap/core18/2253
    tmpfs           767M     0  767M   0% /run/user/1000
    /dev/loop4       56M   56M     0 100% /snap/core18/2284
    /dev/loop5       44M   44M     0 100% /snap/snapd/14549
    /dev/loop6      111M  111M     0 100% /snap/core/12603
    /dev/loop7      4.8M  4.8M     0 100% /snap/yq/1515
10. How to fix error
1. Cannot access the AWS Cloud9 instance
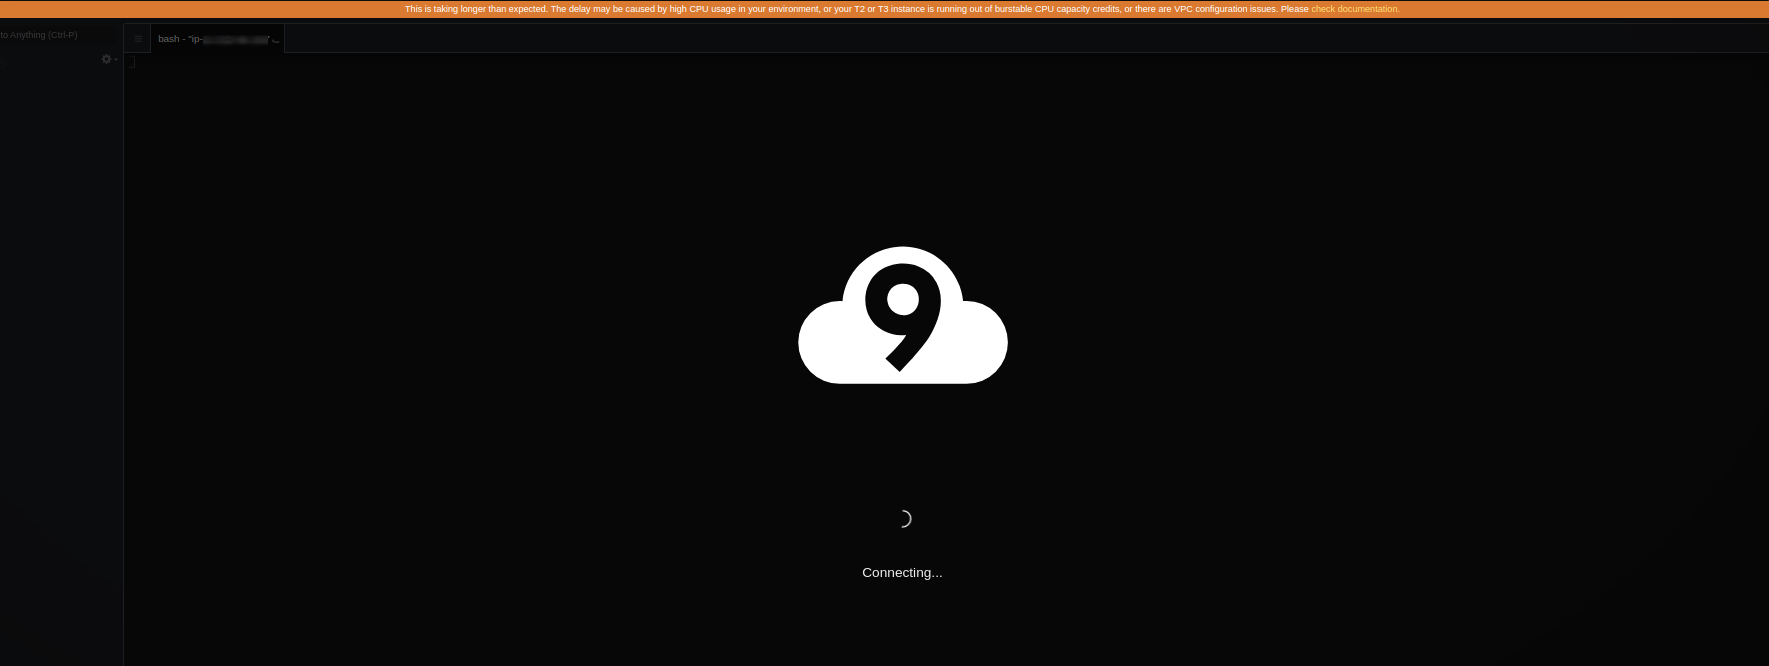
The VPC must have a public subnet. (A subnet is public if its traffic is routed to an internet gateway.) If you’re using a public subnet, attach an internet gateway to the VPC so the SSM Agent for the instance can connect to Systems Manager. If you’re using a private subnet, allow the instance for the subnet to communicate with the internet by hosting a NAT gateway in a public subnet [8]. If you cannot access the AWS Cloud9 instance as shown in Fig. 6, you can check the subnet in the Amazon Virtual Private Cloud (VPC) - Section 7. How to set up a route table for the internet gateway.
2. Cannot access the AWS Cloud9 instance
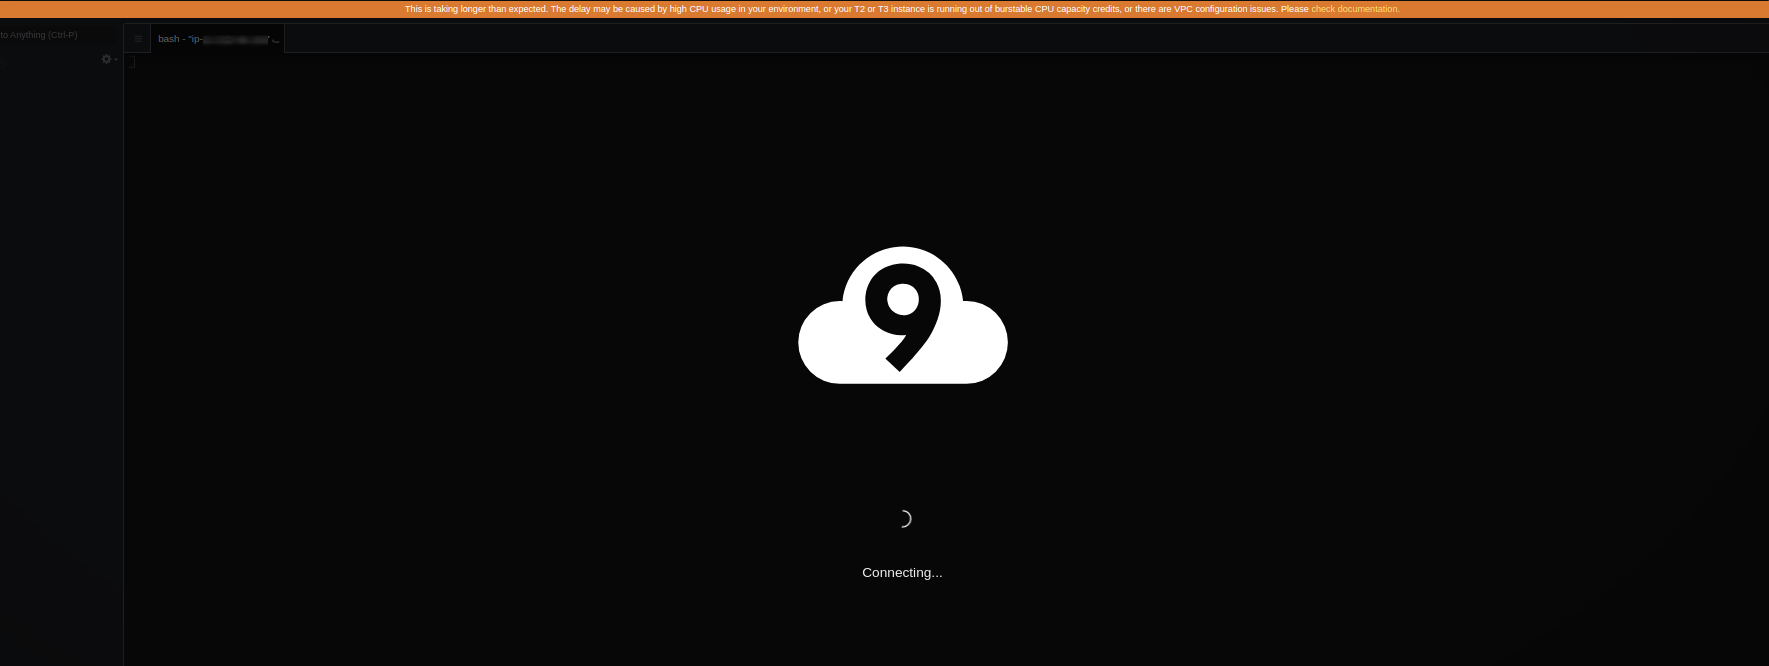
If you lose an original authorized key which is located in ~/.aws/authorized_keys, you can never access the AWS Cloud instance as shown in Fig. 7. In this case, I recommend you terminate the Cloud9 instance and create a new one. You can get more information in the Section 7. How to create and import a SSH key.
11. Reference
- Regions and Zones
- AWS Cloud9
- Update IAM settings for your workspace
- Ensure the ELB service role exists
- Prerequisites
- Install kubernetes tools
- Install HELM CLI
- Amazon VPC requirements for AWS Cloud9